


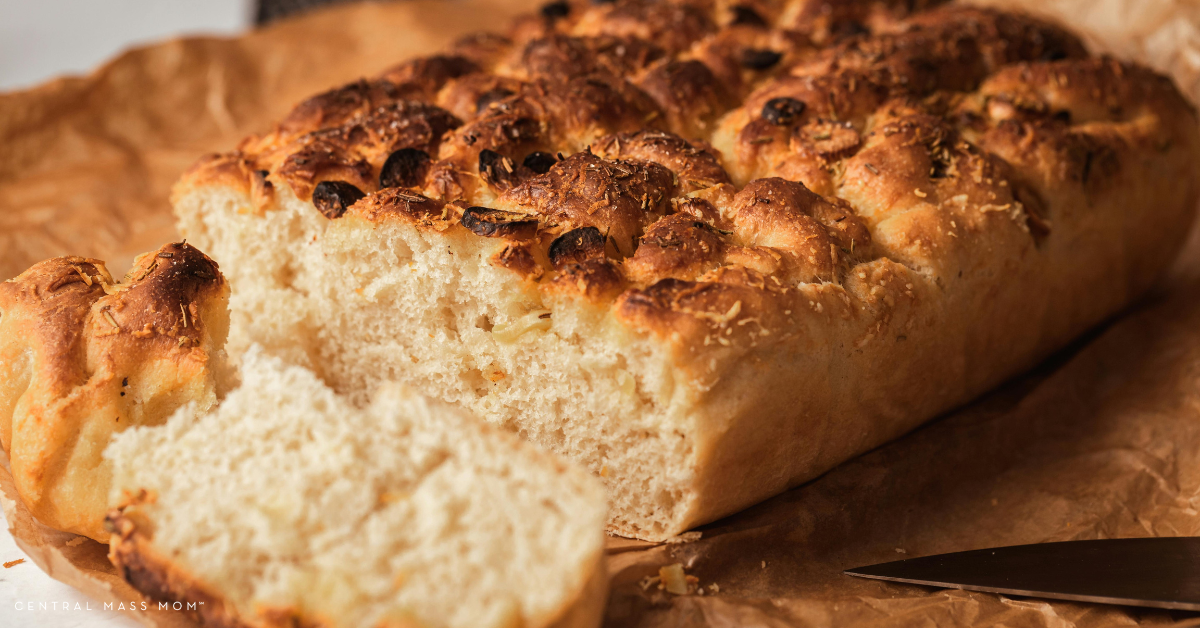
 Lea Shell’s Focaccia recipe is so easy, you’ll find yourself purposely over-proofing your sourdough so you have an excuse to make this no fail focaccia recipe!
Ingredients
Equipment
Method
Preparing your Sourdough Starter
- Feed your sourdough starter 1/2 cup of flour and 1/3 cup of water (or whichever ratio you generally feed) so that you have enough to make this recipe. I practice a method of sourdough making that does not have any discard because I work for money and that since flour also costs money, I'm not convinced that mixing it with water and then throwing it in the compost bin is a worthwhile endeavor.
- At this point I grab a 4 cup mason jar and fill it with filtered water from my fridge and loosely put the lid on it so remaining chlorine can off-gas and it can get to room temperature. Set aside. But not too far aside that you forget and grab it later and say, “What’s this water for?” And then you tip it a little and the water spills out onto your socks. Wet socks are the worst. So keep it close.
Bulk Fermentation
- Find your big, heavy non-metal bowl and your stirring stick. Mine is a literal wood stick. A wood spoon will suffice.
- Place the large bowl on top of your heating mat sometimes used for kombucha. Which is actually a mat for growing plants. Mine has no temperature gauge, so I just plug it in. Plug yours in, too.
- Pour 0.5 cups of your sourdough starter into your large bowl.
- Walk away and do something else for as long as it takes for you to forget you’ve done this (4 hours is usually sufficient). Big bubbles should have appeared? Sometimes? The microbes have theoretically doubled at this point, so move on to the next step.
- Get a 1 cup measuring cup for dry ingredients. Find the water you set aside earlier. Add 2.5 cups of the water you set aside using the measuring cup, granted you were able to find it.
- Stir it up using your stick. The fed starter should float a little now, stir it faster. You’ll get a milky blend of happy sourdough-making microbes. Smile back at them. They like this.
- Dry out your measuring cup with a paper towel. Or something that’s not a paper towel but something that’s clean because you’re about to measure out your flour and you don’t want it to be wet. Yes. I know. Don’t judge me; my kitchen scale is in my basement because it’s for weighing mail and that’s a lot of stairs (13) and I am not that kind of baker anyways.
- Measure out 5 and 1/2 cups of flour.
- I recently switched to the hi-gluten Sir Lancelot flour from King Arther which I buy 50 pounds at a time at our local restaurant supply store for about fifty cents a pound, I always go with my friend who happens to be a rabbi and bakes even more bread than me. I would recommend finding one nearby, it saves a lot of trips if you make 2 loaves a week like me. The restaurant supply store, not the rabbi, but also rabbis make great friends; so maybe pick up one of those, too, but not necessary for this specific recipe, just good life advice in general.
- Mix up your flour and water + starter with your stick. Just a little bit until the flour starts to incorporate and isn't just a pile on top of the water and starter mixture.
- Add 1 1/2 tablespoons of kosher salt (I suppose any salt will do, but after shopping with the Rabbi I feel like it’s possibly important to stick to a theme. Since I've switched to using Kosher salt, Ive been happier with my bread, but your results may vary.)
- Then mix a lot more until your dough is well-mixed and hairy. I think “hairy” is a gross way to describe something as delicious as sourdough, but that’s the word that bakers went with before me… and perhaps it means something to you, too.
- Cover the bowl. Keep it on the heating pad for 4 hours. This is what we sourdough bakers call "Bulk Fermentation." You'll know it's done when it's doubled in size and no longer looks hairy but instead like a wet blob threatening to crawl out of the bowl and onto your counter. If this isn't accomplished after 4 hours, add another hour to your timer and go for a walk or something.
Stretch and Folds and Shaping (or plopping if you need bread before tomorrow)
- Stretch and folds every 20 minutes for another hour, 3x total.
- Split your dough in half. Then shape them into your bannetons. Pick the ugliest loaf and put the other one into the fridge, covered, for later.
Ready to bake? Sorry. More waiting is in your future.
- Take out your 12-ish inch cast iron pan. Pour…let’s say… 3? Tablespoons of olive oil in the bottom. I don’t measure this step at all. I just pour it until I think, “That looks like more than I should have poured,” and then it’s the right amount. Sprinkle the bottom generously with more Kosher salt. Very. Generously.
- Put the “pretty” top side of your ugly loaf in the olive oil to coat it and then flip it over so both sides are coated in salty, oily goodness. Put a lid on it (one of my Calphalon lids fits the pan so I use that). Put it back on the heating mat. Let it sit as long as you like… 4 more hours? All day? Whenever you remember — sometimes this is 11pm for me. Oops.
- You'll know it's ready when there are BIG bubbles and it's trying to crawl out of your pan.
- Pre-heat oven to 450 degrees F.
- If you’d like to put stuff in your bread at this point, go for it!
- Coat your fingers in olive oil from the sides of your pan around your dough. Pop the GIANT bubbles. It might seem sad to pop the giant bubbles because the microbes worked so hard to make all of that CO2 to make that bubble… but they’ll get really big and burn and you’ll be sad. Say “Thanks, Microbes!” while you pop them to feel better about this. They like this and will reward you with good bread. You waited for Godot. (Good Shoes, God, or Good Bread? The literary scholars will still debate. I think it’s the latter. Either way, you get bread.)
- Put your fingers in the dough like in the pictures. You'll be pressing your fingers straight down into the dough until they hit the bottom, this makes those little pockets where butter fits perfectly. It also increases the surface area of the top of your loaf so you can get more flavorings in there. Some combinations of things I’ve put in my focaccia are: 1) Garlic cloves, cherry tomatoes, chunks of Parmesan, Italian Seasoning. 2) Aged gouda, smoked Kalamata olives, Herbes de Provence. 3) Salt, Pepper, Aldi Tomato Sauce from the jar. 4) Cinnamon, Sugar and Butter.
- Beep. Beep. Beep. Oh, right! Your oven has pre-heated by now. Time to get cooking!
- Once the oven is preheated put the bread in the center of the oven, no lid, for 20 to 25 minutes.
- Beep. Beep. Beep. At this time check and see if there is some good black spots on the top and the bottom is cooked through and has developed a golden color. If not, 6 more minutes? Maybe? That should do it.
- Carefully (it's hot!) remove your bread from the pan and place on a large dinner plate or serving dish. Then pour the hot, boiling olive oil and salt over the bread to let it really soak in. It's ok to skip this step...but why would you want to waste all of that delicious olive oil?
- Cut up your freshly baked loaf with kitchen scissors or a very sharp bread knife if it’s still warm and you’re impatient. And serve. Enjoy!For your second loaf make a real loaf as usual… or do this all again. I like to pull it out, setup my heating pad/cast iron skillet contraption before leaving for work and then come home to giant happy bubbles. I've found that cold proofing your loaves for at least 24 hours leads to more sour (and delicious) bread.
Notes
Makes a perfect side dish or meal if your family is like mine and frequently devours an entire loaf of bread straight out of the oven.


