


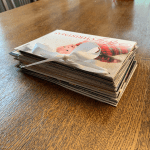
I love sending Christmas cards and I love receiving Christmas cards. I like to keep the ones I’ve been sent so I can look back from time to time, to see how kids have grown over the years and to read any personal messages. But after a few years, the stacks of cards get to be a lot. So I started trying to think of ways to keep them organized.
I found instructions online from Dreamy Elk Photography to make a seriously legit card book for special occasions, and I have made a few of those from wedding cards and baby shower cards, but its a time consuming process for the amateur book maker, so I opted to make something myself that was a little quicker to complete.
Simple Holiday Card Book How-To
You will need:
- stack of cards
- ribbon
- hole punch
- scissors
- tape
Instructions:
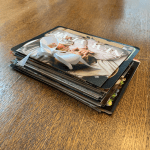
- Find the shortest card in your stack and make two holes along the left side, making sure the holes aren’t too close to the edge, so they won’t rip when you put the ribbon through later. Finding the shortest card in the stack ensures that when you hole punch the rest of the cards, both holes will fit on all of the cards.
- Use your shortest card as a template for where to punch your holes in another card. Here you have two options, (1) you can line up the bottom edge of the cards or (2) you can center the holes along the left edge of each card. Lining up the bottom edge will allow the book to stand on its end once complete. Some people might like the centered look better, but it won’t stand very well. I have done it both ways and I prefer the book to be able to stand, but that depends on how you plan to store your books.
shortest card in the stack laying on top of another card - Repeat step 2 with every card you want to put in your book.
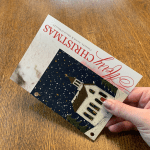
- Once all of your holes are punched, you’ll take your ribbon and lace it through the top of each card, from back to front. If the type of ribbon you are using is prone to fraying, you can tape the end to make it easier to feed through the holes.
- After you’ve got the ribbon through all the top holes, you’ll take the other end of your ribbon and lace it through the bottom holes, again from back to front.
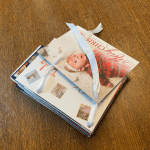 By now, you should have the two ends of your ribbon sticking out the front of the top card. Next, you will tie a knot using the two ends of the ribbon. Make sure to leave some wiggle room between your knot and the top card. If you tie the knot too tightly, the book won’t open. Check that you’ve left enough room before you pull the knot tight, by opening the book. If it feels tight, redo the knot a bit looser until it feels comfortable to you.
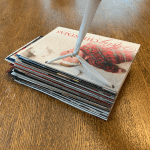
- Once you’ve got your knot, tie a pretty bow and you are done.


