


Maybe it is a snow day or just a slow weekend at home, and you’re looking for something fun for your little one to do. Try out some of our winter-themed crafts that are both fun and great for developing fine motor skills. Most take only a few minutes to set up and use supplies that you likely have on hand.
Snowman Mash
Supplies:
- Gallon-sized zip-top plastic bag
- Inexpensive hair gel and/or water
- Blue food coloring
- Pom poms
- Permanent Marker
- Tape
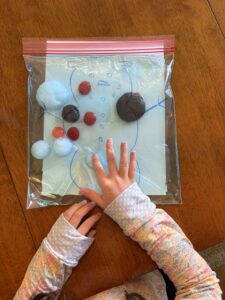
Set up: Draw a snowman shape on the outside of a gallon-sized plastic bag. Next, fill the bag about halfway with some clear hair gel, some water, and a few drops of blue food coloring. If you don’t have hair gel, just water works fine too! Finally, add in some pom poms and close up the bag (get out as much air as you can). Depending on how rough you expect your little one to be, you may want to tape the top of the bag shut or even tape the bag down to the table to prevent snowman explosions! I placed a piece of white paper under the bag to make the snowman shape show up better for little eyes.
Activity: Have your child use their finger to slide and smush the pom-poms into the outline of the snowman. Can they give the snowman some buttons? How about a nose? Can they smush all of the pom pots to the bottom like a big pile of snow? Not only is this a really fun sensory experience, but it is also great for working those finger muscles as they carefully guide the pom poms into place.
Snowflake Posting
Supplies:
- A box, like an old shoe box or cereal box
- Tape
- Blue Construction Paper
- Marker
- Something sharp, like scissors or a pencil
- Q-tips, cut in half
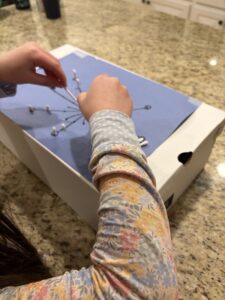
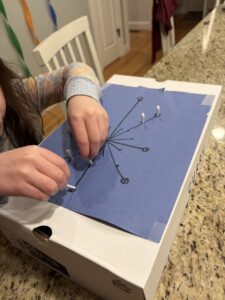
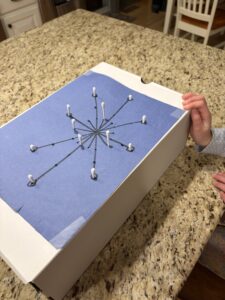
Set up: Cover an old shoe box with blue construction paper. Draw a simple snowflake shape on top. Using scissors or a sharp pencil, poke small holes along the lines of the snowflake. Cut enough Q-tips in half to match the number of holes you made in the box.
Activity: Show your child how they can insert the cut Q-tips into the holes of the snowflake. This focuses on a skill called posting, where a child releases an object into a specific space, like the holes in the snowflake. They can place them in and out as many times as they would like. You can even have them work on making a pattern if they want a bigger challenge, such as placing a Q-tip only in every other hole.
Watercolor Snowflakes
Supplies:
- Coffee filters
- Scissors
- Washable markers
- Spray bottle filled with water
Set up: Depending on the age of your child, you may want to cut out snowflake shapes for them. If not, cutting can be a part of the activity itself!
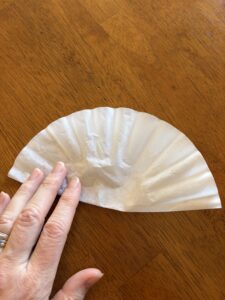
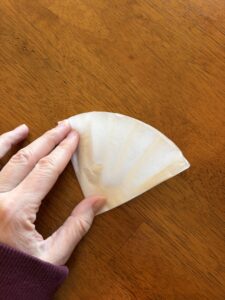
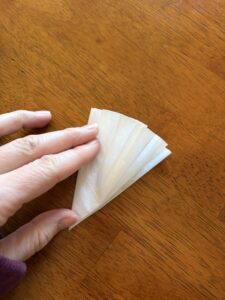
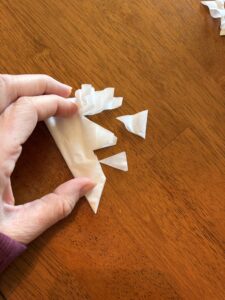
Activity: First, have your child fold the coffee filter in half three times. I like to remember it like this – fold in half (taco), in half again (pizza), and in half again (ice cream cone).
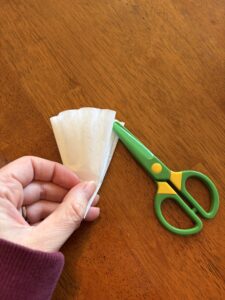
Next, ask them to hold it from the bottom of the “ice cream cone” and start making snips and shapes to design the snowflake. Triangle cutouts are a good shape to start with before trying more rounded cutouts.
Then, have them unfold the coffee filter and color it with some markers. Try some with lots of coloring and others with just a few dots of color. Finally, spritz the colored snowflake with some water and watch the colors expand! You may want to do this on top of a paper plate, a piece of paper towel, or wax paper because the colors will run onto the surface below the coffee filter. Place them aside to dry and then hang them up for really fun decorations!
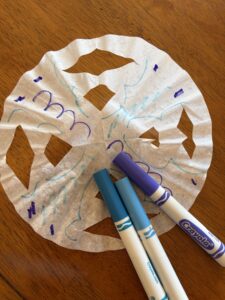

This craft really hones in on fine motor skills as they press and fold the coffee filter, manipulate the scissors, hold markers, and squeeze the spray bottle trigger.
Let us know which crafts your children enjoy and tag us in any photos of their finished projects!


